Docker Project for DevOps Engineers.
#90DaysofDevOps Challenge - Day 17

I am an aspiring DevOps engineer with a strong passion for learning and growing in this field. After being inspired by my roommate's journey from mechanical engineering to DevOps, I realized my own affinity for computers and decided to pursue this path towards success. Please guide me on this journey
In this blog, we will learn about the Dockerfile.
Dockerfile
A docker file is a set of instruction text files to build the Docker image. it has the step by step instructions to build the image.
Let's start-------------You can use the text editor to create the Dockerfile, the name really does not matter and Dockerfile is the default name but you can use any name as per your understanding.
Each command creates new layers that get pushed to the local image cache.
Dockerfile for NGINX
#simple Dockerfile for you
# Lines preceded by # are regarded as comments and ignored.
# The line below states we will base our new image on the Latest Official Ubuntu
FROM ubuntu:latest
# owner of an image
MAINTAINER OWNER_NAME
# Update the image to the latest packages
RUN apt-get update && apt-get upgrade -y
# Install NGINX.
RUN apt-get install nginx -y
# Expose port 80
EXPOSE 80
# The actual command to start up NGINX within our Container
CMD ["nginx", "-g", "daemon off;"]
FROM - base image upon which the subsequent instructions will be built. It defines the starting point for creating a new Docker image.
FROM <image>[:<tag>]
--
FROM ubuntu:20.04
RUN - instruction executes the specified command in a new layer on top of the current image and commits the results. Each RUN instruction creates a new intermediate image layer, and the changes made in that layer are preserved for subsequent instructions in the Dockerfile.
RUN <command>
##
RUN apt-get update && apt-get install -y package-name
ADD - copy files, directories, or remote URLs from the build context or from a URL to the file system of the container being built.
ADD /local/file.txt /inside_container/file.txt
##
ADD https://example.com/file.txt /app/
COPY - expects a local file or directory path relative to the build context. It does not support URLs or downloading files from remote locations.
COPY <src> <dest>
##
COPY app.jar /app/
CMD - The CMD instruction in a Dockerfile is used to specify the default command and/or parameters to be executed when a container based on the image is run. It determines the primary process that should be executed within the container.
CMD ["executable", "param1", "param2"]
--
CMD ["node", "app.js"]
EXPOSE - instruction in a Dockerfile is used to inform Docker that a particular container listens on specific network ports at runtime. It does not actually publish the ports or make them accessible from outside the container. Instead, it serves as metadata for the person running the container to know which ports are intended to be exposed.
EXPOSE <port> [<port>/<protocol>...]
##
EXPOSE 80
WORKDIR - instruction in a Dockerfile is used to set the working directory for any subsequent instructions in the Dockerfile. It allows you to specify the directory where commands like RUN, CMD, COPY, and ADD will be executed.
WORKDIR <directory>
##
WORKDIR /app
ENTRYPOINT - Sets the default application used every time a Container is created from the Image. If used with CMD, you can remove the application and define the arguments there.
ENTRYPOINT ["executable", "param1", "param2", ...]
##
ENTRYPOINT ["echo", "Hello, Docker!"]
ENV - Environment variables are key-value pairs that can be accessed by processes running within the container. They provide a way to configure the runtime environment and pass configuration values to applications running inside the container.
ENV <key>=<value> ...
##
ENV APP_VERSION=1.0.0
VOLUME - It allows you to specify directories or files within the container that should be treated as volumes, enabling data to be persisted outside the container's lifecycle.
VOLUME ["<directory>", ...]
##
VOLUME ["/data"]
Task: Okay.......Let's Create a Dockerfile for a simple web application with a Python app.
Dockerfile for a simple Python web application using Flask
Flask is a popular Python microweb framework that helps you develop lightweight web applications and APIs quickly and easily.
Basic directory structure:
After completing the following steps, our application directory structure will look like this:
flask-docker
├── app.py
├── Dockerfile
├── requirements.txt
└── venv
Set up & Installation.
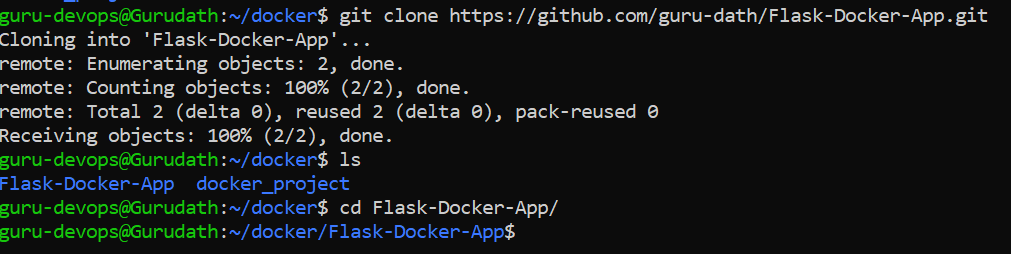
1 .Clone/Fork the git repo and create a virtual environment.
git clone https://github.com/guru-dath/Flask-Docker-App.git
cd Flask-Docker-App
python3 -m venv venv
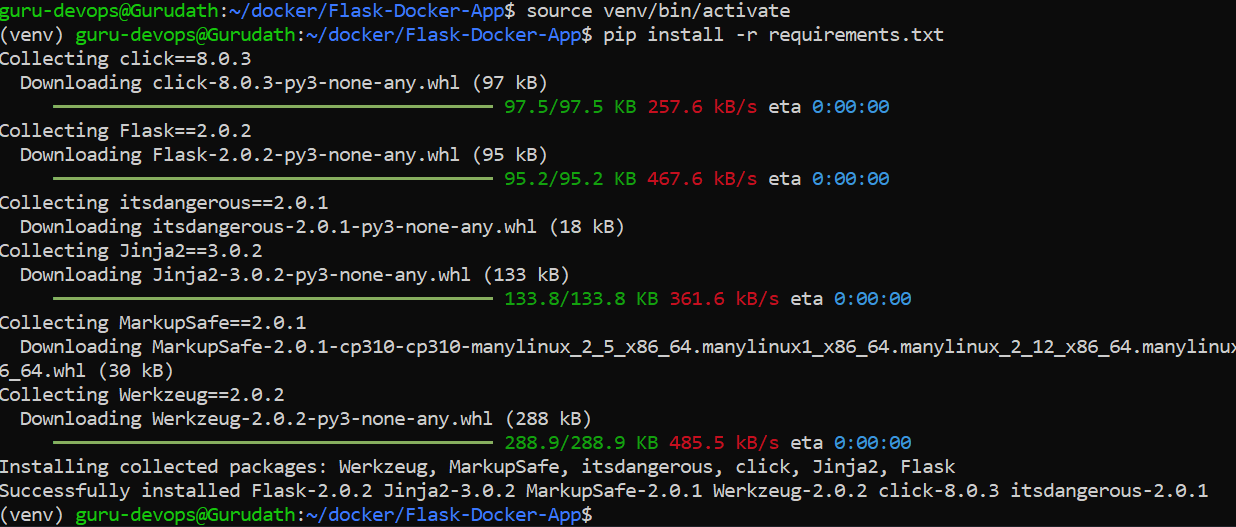
2 .Activate the environment

3 .Install the requirements
#Activate the virtual environment:
source venv/bin/activate
#Install the requirements:
pip install -r requirements.txt
4 .Run the application: after running the python app.py, paste the IP address followed by ":5000" into the web browser.
#Run the command
python app.py

5 . Our Dockerfile looks..like this.
FROM python:3.9.2

WORKDIR python-docker

COPY requirements.txt requirements.txt

RUN pip3 install -r requirements.txt

COPY . .

CMD [ "python3", "-m" , "flask", "run", "--host=0.0.0.0"]
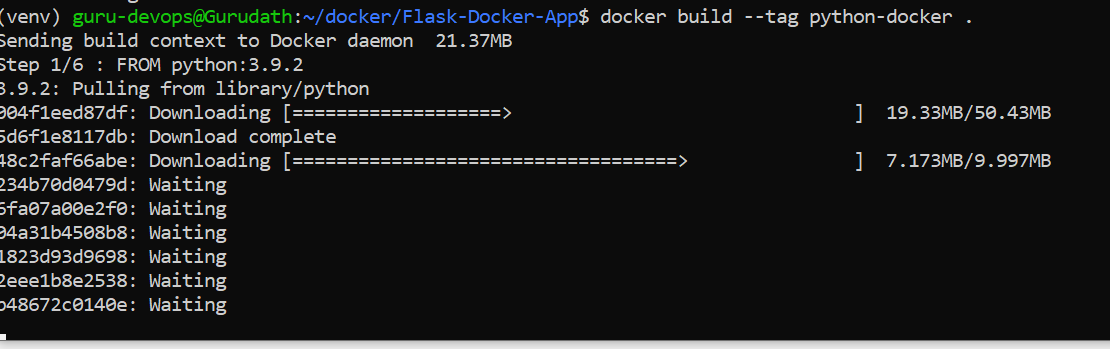
Using docker build, we can now enlist Docker's help in building the image. You can combine the build command with other tags, such as the "--tag" flag, to specify the image name.
docker build --tag python-docker .

How to run an image as a container
Running an image inside a container is as simple as building one. But before we do so, we'd like to see what other images are available in our environment. To view images from the command line, execute the following:
docker images
If the above command finds any images, the output should look something like this:

The best solution is to run the image in detached mode. Because we need to view this application in the browser rather than the container, we'll modify our docker run and add two additional tags: "-d" to run it in detached mode and "-p" to specify the port to be exposed.
The docker run command will now be formatted as follows:
docker run -d -p 5000:5000 python-docker

This time, we'll see the following output if we run it in detached mode and visit localhost at port 5000:

We can use the following command to see which containers are currently running:
docker ps

To stop the currently running container, we execute this command:
docker stop <container-name>
Push the image to a public or private repository (e.g. Docker Hub )
Before pushing the image, you need to tag it with the repository name. Replace repository-name with the name of your repository. The tag can be optional or specify a specific version of the image.
docker tag image-name repository-name:tag

Use the docker push command to upload the tagged image to the repository.
docker push repository-name:tag

Another useful command to have when working with Docker is this one:
docker container prune
To clean up all data (The docker system prune -a command is used to clean up unused Docker resources, including stopped containers, unused networks, dangling images, and build cache. The -a flag is used to remove all unused resources, including those that are not associated with a container or an image.)
docker system prune -a
And that's it!

Thank you for taking the time to read this article. 😊📖 Hope you found it helpful! 🌟 If you have any questions or want to share your thoughts, feel free to leave a comment below. 💬 Happy learning! 🌈🚀


