Advance Git & GitHub for DevOps Engineers: Part-2
#90Days DevOps Challenge Day-10


1.Git Stash:
Git stash is a feature in Git that allows you to temporarily save changes you've made to your working directory without committing them. Here's a brief overview of how to use Git Stash.
To save your changes, run the following command:
git stash save "Your stash message"
If you want to include untracked files, use the
-uor--include-untrackedflag:git stash save -u "Your stash message"To list all your stashes, use:
git stash listIf you want to apply the most recent stash and remove it from the stash list, use:
git stash popTo apply a specific stash (identified by its stash index), use:
git stash apply stash@{index}If you want to keep the stashed changes but apply them on top of your current changes, use:
git stash apply --index stash@{index}To discard a stash (identified by its stash index), use:
git stash drop stash@{index}
2.Cherry -pick:
The git cherry-pick command allows you to apply specific commits from one branch to another. It essentially allows you to pick individual commits and apply them to a different branch.
To utilize the cherry-pick feature in Git, you'll begin by establishing two fresh branches and committing changes to each of them. Next, employ the command git cherry-pick <commit_hash> to handpick desired commits from one branch and incorporate them into the other branch.
Start by switching to the branch where you want to apply the commit(s). You can use the following command to switch branches:
Identify the commit(s) you want to cherry-pick. You can find the commit hash by using
git logor other Git history visualization tools.Run the
git cherry-pickcommand followed by the commit hash(es) of the commit(s) you want to apply:If you have multiple commits to cherry-pick, you can specify them in order:
Git will attempt to apply the changes from the specified commit(s) to your current branch. If there are conflicts, you will need to resolve them manually.
After resolving conflicts (if any), you can use
git cherry-pick --continueto continue the cherry-picking process. Alternatively, you can usegit cherry-pick --abortto abort the cherry-pick operation and return to the original state.Repeat steps 3-5 for any additional commits you want to cherry-pick.
That's it! The cherry-picked commit(s) should now be applied to your current branch.
Resolving Conflicts:
Resolving conflicts in Git occurs when there are conflicting changes between different branches or commits. When Git encounters conflicts, it marks the conflicting areas in your code and allows you to manually resolve them.
Here's a step-by-step guide on how to resolve conflicts in Git:
When you encounter a conflict, Git will notify you with a message. You can also check the status of your repository using
git statusto see which files have conflicts.Open the conflicting file(s) in a text editor. Git will highlight the conflicting sections with special markers like
<<<<<<<,=======, and>>>>>>>.Inside the conflicting file(s), modify the code to resolve the conflicts. You can choose to keep one version of the code, combine both versions, or make entirely new changes. Remove the conflict markers (
<<<<<<<,=======,>>>>>>>) once you have resolved the conflicts.After resolving the conflicts, save the file(s) with the resolved changes.
Once you have resolved all conflicts in the file(s), add the modified file(s) to the staging area using:
git add <file>Once all conflicts are resolved and the files are staged, you can continue the merge or cherry-pick process by running one of the following commands:
For merge conflicts:
git commitFor cherry-pick conflicts:
git cherry-pick --continue
These commands will create a new commit with the resolved conflicts.
- If there are additional conflicts, repeat steps 2-6 until all conflicts are resolved.
Remember, it's essential to carefully review and test the changes after resolving conflicts to ensure everything functions as expected.
If you encounter difficulties in resolving conflicts, you can use tools like graphical Git clients or merge conflict resolution tools to assist you in visualizing and resolving conflicts.
Task-01:
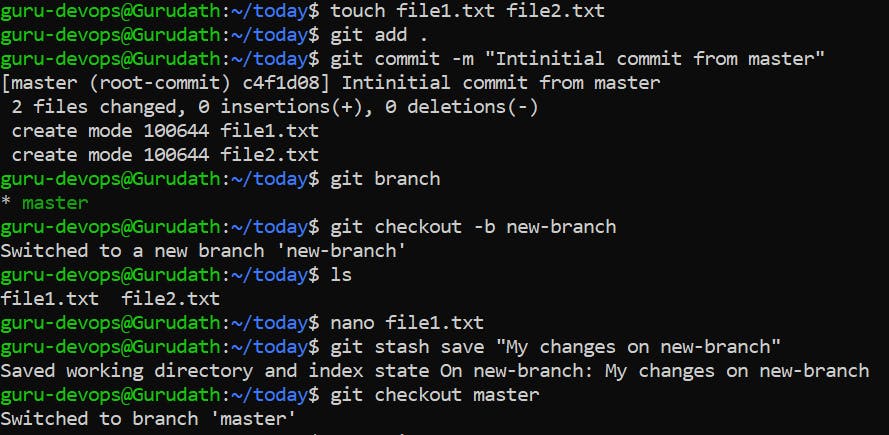
Create a new branch and make some changes to it.
Use git stash to save the changes without committing them.
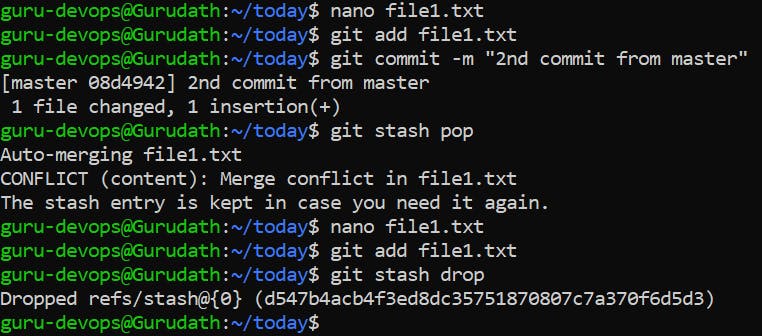
Switch to a different branch, make some changes and commit them.
Use git stash pop to bring the changes back and apply them on top of the new commits.
Task-02:
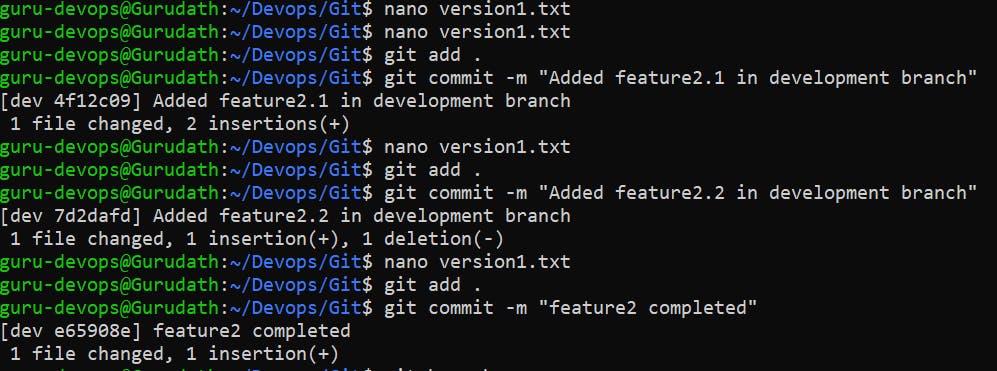
In version01.txt of development branch add below lines after “This is the bug fix in development branch” that you added in Day10 and reverted to this commit.
Line2>> After bug fixing, this is the new feature with minor alteration”
Commit this with message “ Added feature2.1 in development branch”
Line3>> This is the advancement of previous feature
Commit this with message “ Added feature2.2 in development branch”
Line4>> Feature 2 is completed and ready for release
Commit this with message “ Feature2 completed”
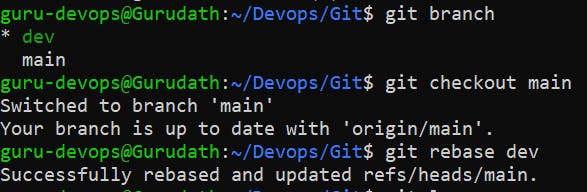
All these commits messages should be reflected in Production branch too which will come out from Master branch (Hint: try rebase).

*************************************************
Thank you for reading my blog on Advance Git & GitHub for DevOps Engineers - Part 2. I hope you found it informative and useful in your work with Git and GitHub