

What is Pipeline?
A pipeline is a series of stages or steps that guide the flow of work or processes toward a specific goal.
In software development, a pipeline is like a roadmap that guides the process of building and delivering software. It outlines the order in which different tasks are completed, starting from writing the code to testing it and finally deploying it to users.
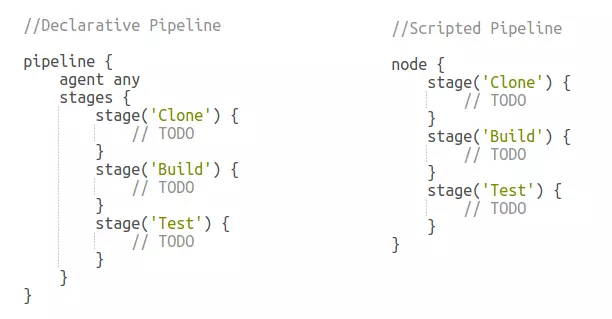
There are two approaches to creating a pipeline: the Declarative pipeline and the Scripted pipeline.
Scripted Pipeline:
It uses a more flexible and advanced scripting language called Groovy.
You have full control and freedom to write custom code to define your pipeline.
You can create your own functions, loops, conditions, and variables within the pipeline script.
It requires a good understanding of Groovy and Jenkins internals, so it's more suitable for experienced users.
Declarative Pipeline:
It uses a simpler and more structured syntax that's easier to read and understand.
You define your pipeline using a predefined set of stages and steps.
It's more focused on the overall flow of the pipeline rather than writing custom code.
It's recommended for beginners or users who prefer a straightforward and concise approach.
For more details refer to the link youtube.com/watch?v=GJBlskiaRrI
Jenkins File
A Jenkinsfile is a text file written in Groovy syntax that resides in the source code repository of your project. It defines the entire pipeline flow, including the various stages, and conditions involved in the CI/CD process. With Jenkinsfile, you can configure and automate the entire pipeline from start to finish, making it a powerful tool for achieving continuous integration and deployment.
Exploring a Jenkinsfile To illustrate the concept, let's consider a simple scenario: building and deploying a web application using Jenkins. Here's an example of a Jenkinsfile:
pipeline {
  agent any

  stages {
    stage('Build') {
      steps {
        // Compile and package the application
        sh 'mvn clean package'
      }
    }

    stage('Test') {
      steps {
        // Run unit tests
        sh 'mvn test'
      }
    }

    stage('Deploy') {
      steps {
        // Deploy the application to a server
        sh 'scp target/app.war user@server:/path/to/deployment'
      }
    }
  }
}
In this Jenkinsfile example, we define a pipeline with three stages: "Build," "Test," and "Deploy." Each stage contains specific steps to be executed. For instance, in the "Build" stage, we use Maven to clean and package the application. The "Test" stage runs the unit tests, and the "Deploy" stage deploys the packaged application to a server using SSH.
Benefits of Jenkinsfile
Jenkinsfile brings several advantages to your CI/CD workflows. Firstly, it enables version control, allowing you to track changes, collaborate, and roll back to previous configurations if needed. It also provides a single source of truth for your pipeline, making it easier to maintain and share across teams.
Additionally, Jenkinsfile offers flexibility and extensibility. You can incorporate conditional logic, parallel execution, and integration with external tools to customize your pipeline based on project requirements. By leveraging the power of Jenkinsfile, you can automate complex deployment processes, enhance code quality through testing, and foster seamless collaboration between development and operations teams.
Simple hands-on for Jenkinf file:
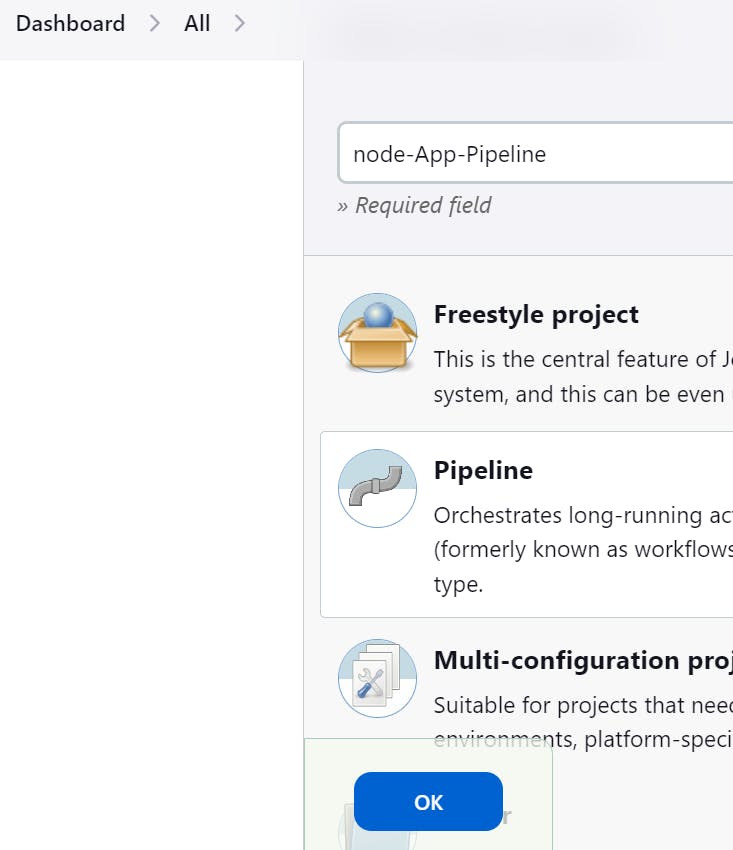
Go to the Jenkins dashboard and click on "New Item."
Provide a name for your new item and select "Pipeline" from the options below. Then click "OK."
On the new page that opens, you can add a description if needed. Select the Git project and paste the GitHub URL of your project.
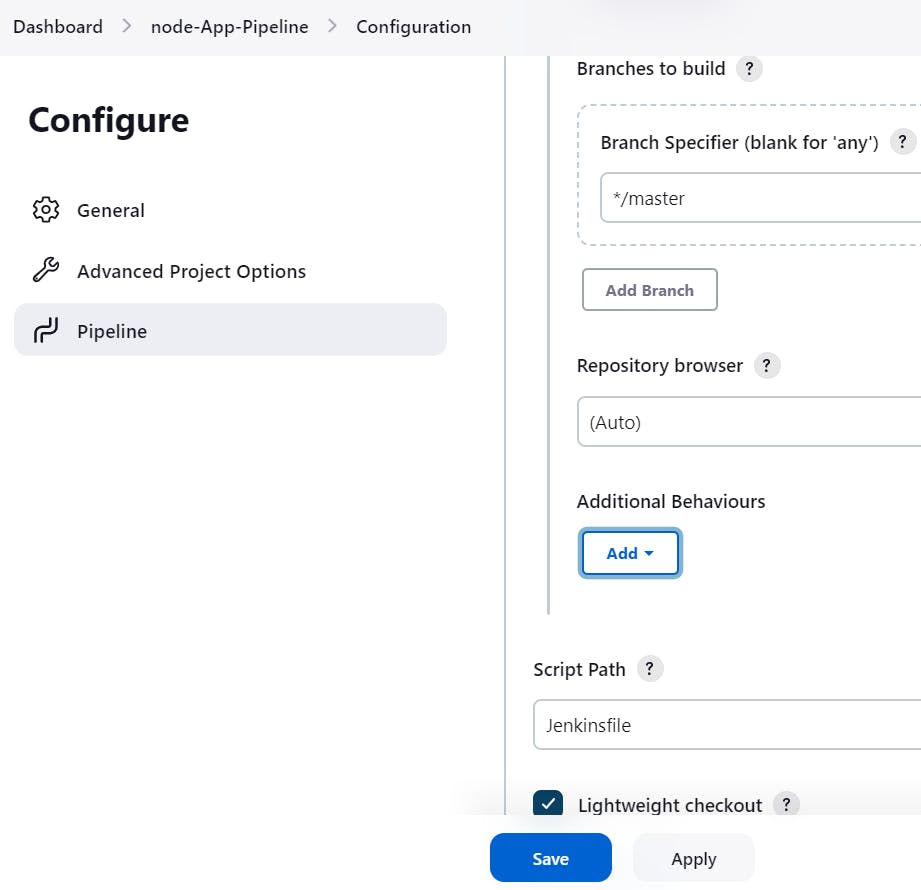
Scroll down to the "Pipeline" section and choose "Pipeline script from SCM." Below that, select "Git" as the SCM (Source Code Management) system.
Add the GitHub repository URL and enter the branch name that corresponds to your GitHub repository.
Provide the path of the Jenkinsfile that you saved in the GitHub repository.
Click "OK" to save the configuration.

Now, Jenkins is all set up to use your pipeline script defined in the Jenkinsfile. To initiate a build:
On the Jenkins dashboard, find your pipeline job and click on it.
Click on "Build Now" to trigger a new build.
Jenkins will follow the steps defined in the Jenkinsfile and execute the pipeline, building, testing, and deploying your code as specified.
Thats iT
Thank you for taking the time to read this article. 😊📖 Hope you found it helpful! 🌟 If you have any questions or want to share your thoughts, feel free to leave a comment below. 💬 Happy learning! 🌈🚀